The main function of TGPX is to maintain a database of galleries, so it is obviously important to understand how the software handles them. This document will give you an overview of how to add, maintain, and remove galleries.
Searching Galleries
To search the current galleries in your database so you can modify or delete them, access the Galleries > Search Galleries function from the control panel menu. This will display a page where you will be able select a number of different search options so you can quickly locate the gallery(ies) you want to work with. Most of the database fields that you can search use the software's Standard Search function, however some of the fields use the Boolean Search feature. The fields that you can use with the Boolean Mode Search are:
- Description,Keywords
- Keywords
- Tags

- Use this checkbox to select this gallery when you want to run a function on multiple galleries at once
- This section displays the galleries current settings. These items can be edited by clicking on them, which is described below.
- This is the ID number assigned to the gallery
- These are the functions that you can run on this specific gallery
- This is the value that the current search results were sorted by
- This is a placeholder that will appear when a gallery does not have a preview thumbnail. Click on the green arrow to upload a preview thumbnail for this gallery or the scissors to use the web-based cropping utility to create a preview for this gallery.
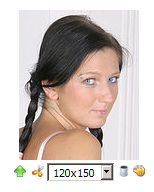
You can use the drop down selection box to view the other preview thumbnails assigned to this gallery. Click on the
 icon to upload a new preview thumbnail, the
  icon to use the web-based cropping utility to create a new preview thumbnail,
or the
icon to use the web-based cropping utility to create a new preview thumbnail,
or the  icon to delete the preview thumbnail that is currently displayed. You can also apply filters to preview thumbnails
by clicking on the
icon to delete the preview thumbnail that is currently displayed. You can also apply filters to preview thumbnails
by clicking on the  icon. The functions available in the filters interface are described below.
-
Sharpen (only available if using ImageMagick)
This filter allows you to sharpen the thumbnail. Enter two numbers separated by an x character. Larger numbers will increase the sharpening effect. Some values you might want to try are 1x1 and 0.0x0.6
Modulate (only available if using ImageMagick)
This filter allows you to adjust the brightness, saturation and hue of the thumbnail. Specify the percent change in brightness, the color saturation, and the hue separated by commas.
Contrast (only available if using ImageMagick)
This filter allows you to adjust the contrast of the thumbnail. To increase the contrast, click the
 icon. To decrease the contrast,
click the
icon. To decrease the contrast,
click the  icon. You can click each icon multiple times (make sure that the updated image has loaded before clicking an icon again) to
repeat the filter and increase the strength of the effect.
icon. You can click each icon multiple times (make sure that the updated image has loaded before clicking an icon again) to
repeat the filter and increase the strength of the effect.
Normalize (only available if using ImageMagick)
This filter allows you to apply a normalization filter to the thumbnail. This is similar to the Auto Levels feature in Adobe Photoshop which automatically adjusts the black point and white point in an image. Note that this will not always produce a better looking image, so it is up to your judgement to determine when to use this filter.
Enhance (only available if using ImageMagick)
This filter allows you to apply a digital filter to enhance a noisy image. Note that this will not always produce a better looking image, so it is up to your judgement to determine when to use this filter.
Annotation
This filter allows you to apply one of your pre-defined annotations to the thumbnail. All of the annotations you have defined are listed in the drop down menu. Select the one you want to apply and click the
 icon to add that annotation to the image.
Undo
Press this button to undo the last filter that you applied. You can press this button multiple times to step backwards through the filters you have applied.
Reset
Press this button to reset the image to the way it appeared before you began applying filters.
Save
Once you have applied the filters that you like, press the save button to save the updated image as the new preview thumbnail for this gallery
Cancel
Press this button to cancel all of the filters you have applied and exit the filter interface.
|
|
Click this icon to assign icons to this gallery or multiple galleries. |

|
Click this icon to scan the gallery. A window will appear showing you the scan results. |
|
|
Click this icon to blacklist and delete the gallery. A window will appear where you will be able configure the values you want to blacklist. |
|
|
Click this icon to disable the gallery; this will set the gallery's status to disabled. |
|
|
Click this icon to enable the gallery; this will set the gallery's status back to it's previous setting before it was disabled. |

|
Click this icon to edit the gallery. A window will appear where you will be able to edit all of the gallery settings. |

|
Click this icon to send an e-mail to the gallery submitter. A window will appear where you will enter the e-mail text. |
|
|
Click this icon to approve the gallery (shows only for Pending or Unconfirmed galleries). |

|
Click this icon to reject the gallery (shows only for Pending or Unconfirmed galleries). |
|
|
Click this icon to delete this gallery. |
| Delete | Use this function to bulk delete galleries |
| Use this function to bulk e-mail gallery submitters. A window will appear where you will be able to enter the e-mail text. | |
| Approve | Use this function to bulk approve galleries; the email-gallery-approved.tpl e-mail message will be sent if you have that option enabled |
| Reject | Use this function to bulk reject galleries. When you select this option another select box will appear that will allow you to choose which rejection e-mail message you would like to send. |
| Blacklist | Use this function to bulk blacklist galleries. This will automatically blacklist the gallery hostname, submitter IP, and e-mail address for each gallery. |
| Disable | Use this function to bulk disable galleries. The gallery status will be changed to disabled for each gallery. |
| Enable | Use this function to bulk enable galleries. The gallery status will be set back to it's previous value before the gallery was disabled. |
| Selected Galleries | Apply this function only to the galleries that you selected by checking their associated checkbox in the search results |
| All Matching Galleries | Apply this function to all of the galleries that match the search values you have specified |
| All Galleries | Apply this function to all galleries in the database |
Saved Searches
The Search Galleries interface allows you to save your most commonly used searches so you can access them quickly without having to adjust all of the form fields each time you want to view those galleries.
If you decide that you want to save the search settings that you are currently using, you can click on the
 icon in the header bar near the top of the search interface. This will display a small pop-up interface where you can enter a short string as an easy identifier so you can
load the stored search settings later. Once you have entered the identifier you want to use, click on the
icon in the header bar near the top of the search interface. This will display a small pop-up interface where you can enter a short string as an easy identifier so you can
load the stored search settings later. Once you have entered the identifier you want to use, click on the  icon to save your search settings.
TIP: You can use the special identifier Default to configure the default search that will be used each time you access the Search Galleries interface. For example,
if you want to see Approved galleries every time you first access the Search Galleries interface, put a check in the Approved box and then save that search with the identifier
Default. From now on when you access the Search Galleries interface it will default to showing you your Approved galleries!
If you use the same identifier as an existing saved search, it will overwrite the previous settings with the new settings.
To load a previously saved search, click on the
 icon in the header bar near the top of the search interface. This will display a
small pop-up interface where you can select the saved search you want to load. Click on the
icon in the header bar near the top of the search interface. This will display a
small pop-up interface where you can select the saved search you want to load. Click on the  icon to load those search settings
and have the gallery search interface refresh with the galleries that match your search settings.
icon to load those search settings
and have the gallery search interface refresh with the galleries that match your search settings.
In-Place Editing
In the Search Galleries interface you can quickly edit most of the gallery data by simply clicking on the current value. This will display a field where you will be able to edit and save the new setting that you want to use. For example, if you click on the description (using the example above) you would get something like this:

You can edit this field to have any setting you want. While you are editing the field, the number directly following the input box will indicate the number of characters you have entered. The icons after the character counter can be used to save or cancel your changes. The function of each icon is described below.
|
|
Save this new value only for the gallery you are currently working with |

|
Save this new value for all of the galleries on this page that have their checkbox checked |

|
Save this new value for all of the galleries that match the search criteria you have entered at the top of the page |
|
|
Cancel (don't save) the changes you have made and hide the editing field |
and icons you can quickly edit large numbers of galleries.
Gallery Quick Tasks
From the Search Galleries interface you will be able to access the quick tasks functions which allow you to perform a number of functions on your gallery database. To access the quick tasks interface click on the
 icon in the Search Galleries interface. A popup window will appear displaying
the available functions, which are described below.
icon in the Search Galleries interface. A popup window will appear displaying
the available functions, which are described below.
-
Search and Replace
If you need to quickly search for and replace an item in your entire database of submitted galleries, you can use this function. For example, if you have decided that you no longer want to allow the phrase 'young girl' in the gallery description you can use this function to replace all occurances of that phrase with 'legal teen'. To do this you would enter 'young girl' in the Search For box and select Description for the Search Field. In the Replace With box enter 'legal teen'. You can now press the Search and Replace button and TGPX will automatically go through the entire gallery database replacing each occurance of 'young girl' with 'legal teen'. If you want to search for an empty value, use the special string NULL in the Search For field.
You do need to be somewhat cautious when using this feature because it will locate the text you enter in the Search For box anywhere within the field it is searching. For example, if you wanted to replace the word 'tit' in the gallery description with 'boob' you could run into some problems. If a gallery description has the word 'title' it will end up changing that to 'booble'. To prevent this from happening you can use a space before or after the word to affect how the searching is done. If you enter ' tit ' it will look for the word 'tit' with a space before and after it.
Search and Set
To do a search and set, enter the text you would like to search for and select which field should be searched. You will then need to enter the field that should be updated and what it should be set to. For example, if you wanted to locate all galleries with fetish in the URL and set the Keywords value to fetish, you would enter fetish in the Search For field, select Gallery URL for the Search Field, select Keywords for the Set Field, and enter Fetish in Set Value field. Note that this does not do replacements, but instead sets the field to the value you enter. If you want to search for an empty value, use the special string NULL in the Search For field.
Search and Append
To do a search and append, enter the text you would like to search for and select which field should be searched. You will then need to enter the field that should be appended to and what string should be appended. For example, if you wanted to locate all galleries with fetish in the URL and append the keyword 'fetish' to the current Keywords setting, you would enter fetish in the Search For field, select Gallery URL for the Search Field, select Keywords for the Append Field, and enter Fetish in Append Value field. Note that this will not automatically insert spaces for you. For example, if you are appending to the Keywords value be sure to include a space before the string you want to append (e.g. ' fetish' rather than 'fetish)
Other Functions
Reset click counts to zero for submitted galleries
Click on this link to reset the click counts for all submitted galleries back to zero. This will not affect permanent galleries.
Reset click counts to zero for permanent galleries
Click on this link to reset the click counts for all permanent galleries back to zero. This will not affect submitted galleries.
Remove unconfirmed galleries that are more than 48 hours old
This function is pretty much self explanatory. When you click this link all unconfirmed galleries that are more than 48 hours old will be deleted from the database.
Decrement the used and build counters by one
This will decrement the used_counter and build_counter by one for all galleries in the database.
Cleanup broken thumbnail previews
If you have accidentally deleted some of the preview thumbnails from the TGPX thumbnail directory on your server, you can use this function to have TGPX locate which thumbnails were deleted and remove the references to them in the gallery database.
Galleries can also be imported in bulk by using the Gallery Import feature.
To add a new gallery access the Galleries > Add Gallery function from the control panel menu. This will display a popup window where you will be able to enter the gallery data that you want to use. Each of the form fields are described below.
| The e-mail address that should be associated with this gallery | |
| Submitter Name | The name of the gallery submitter |
| Submitter IP | The IP address of the gallery submitter |
| Gallery URL | The full URL to the gallery |
| Description | The description of the gallery |
| Tags | A space separated list of tags for this gallery. Tags can be used for grouping galleries. |
| Keywords | A space separated list of keywords that describe the gallery. Keywords must be at least 4 characters long |
| Thumbnails | The number of thumbnails that appear on the gallery (i.e. small images that link to the full sized image or movie) |
| Categories |
The categories that the gallery fits into. Multiple categories can be selected by clicking the  icon.
You can remove categories by clicking on the icon.
You can remove categories by clicking on the  icon. icon.
|
| Sponsor | The sponsor that this gallery comes from |
| Status | The status to assign to this gallery |
| Type | The type of gallery, either permanent or submitted |
| Format | The format of this gallery, either movies or pictures |
| Partner | The partner account to associate with this gallery |
| Clicks | The number of clicks this gallery link has received |
| Scheduled Date |
The date and time that this gallery will become eligible for display on your TGP pages.
Note this does not guarantee that the gallery will be displayed on this date, it
simply becomes eligible for selection on this date. This must be in YYYY-MM-DD HH:MM:SS format. |
| Displayed Date |
The date and time that this gallery was selected for display. In most cases it is not necessary to edit this field since the software will
fill it in automatically when the gallery is selected for display. This must be in YYYY-MM-DD HH:MM:SS format. |
| Delete Date | The date and time that this gallery should be deleted from the database. This must be in YYYY-MM-DD HH:MM:SS format. |
| Weight | The weight value to assign to this gallery. The weight value can be any whole number from -2147483648 to 2147483647. Gallery weight values only come into play if you are using the weight sorting option in the order or reorder settings of the {galleries} template command |
| Icons | If you have configured any icons, they will appear below the Weight setting and can be selected by putting a check in the box next to them. |
|
Allow the gallery scanner to scan this gallery Uncheck this option if you do not want the gallery scanner to scan this gallery |
|
|
Allow the gallery scanner to create a thumbnail for this gallery Uncheck this option if you do not want the gallery scanner to be allowed to create a preview thumbnail for this gallery |
Gallery Status
When galleries are submitted they are assigned a status which determines how they will be handled by the software and when they will be displayed on one of your TGP pages. Each of the available status options are described below. submitting','unconfirmed','pending','approved','used','holding','disabled
| Unconfirmed | Galleries that have been submitted but not yet confirmed through the submitter's e-mail address |
| Pending | Galleries that have been submitted (and optionally confirmed) but not yet approved by an administrator |
| Approved | Galleries that have been approved and are currently waiting to be displayed on one of your TGP pages |
| Used | Galleries that are currently displayed on one (or more) of your TGP pages |
| Holding | Galleries that have been displayed on one of your TGP pages in the past, but are no longer displayed |
| Disabled | Galleries that have been disabled by an administrator or the gallery scanner and are not eligible for display |
Reviewing Pending Galleries
TGPX has a dedicated interface for reviewing pending galleries that allows you to quickly view each gallery and edit any of the gallery settings before you approve it. The Reviewing Galleries section of this manual covers this software feature in greater detail.
Editing a Gallery
To edit a gallery you will first need to locate it through the Gallery Search interface. When you locate the gallery you want to edit, click on the
icon
to bring up the gallery editing interface. This interface is nearly identical to the gallery addition interface, and has the same form fields with the same properties. You can make the changes that you want,
and then press the Update Gallery button to save your changes.
Deleting a Gallery
To delete a gallery you will first need to locate it through the Gallery Search interface. When you locate the gallery you want to delete, click on the
icon, which will ask you to confirm the deletion.